 It sounds as a bit of a weird title, but I will explain in a second why I chose this rather strange title. A few days ago I received an email, offering me a licensed copy of the SnapIt software, if I was prepared to try the software out and write a review about it in my Blog. The name rang a soft bell, and I thought: why the heck not? So here it is!
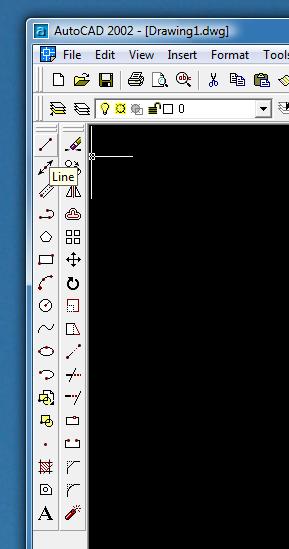
When I worked as an engineer in a big engineering office as a civil engineer, I was heavily involved in CAD development and training from a civil engineering point of view. No training is complete without training manual, but how do you explain to (often) not very experienced CAD users how to achieve something, like drawing a line?
The easiest way is to show it in a picture and combine it with an instruction.
Example :
1. Click on the “line” button in the left hand menu.
Etc.
 I have always created these pictures using the “print screen” option, hence create an image of the full screen, use Control-v to insert the picture in my word document, and then crop it to size, and if necessary reduce or blow the picture up a bit.
Sounds quite tedious, and it was. I have created many a training manual using this rather long winded way.
We had SnapIt software in the office, but I seem to remember it was illegally obtained, and nobody could explain to me how it worked.
Nowadays, being a retired engineer, there is no need to write manuals any more. On the other hand, I have been using the above method not only in Blogs, but also in letters answering questions of clients involving e.g. street maps.
The SnapIt evaluation version I have now does the same thing as the PrintScreen option I have been using, only a lot quicker. The procedure is super simple. Assign a key to SnapIt (I chose F12).
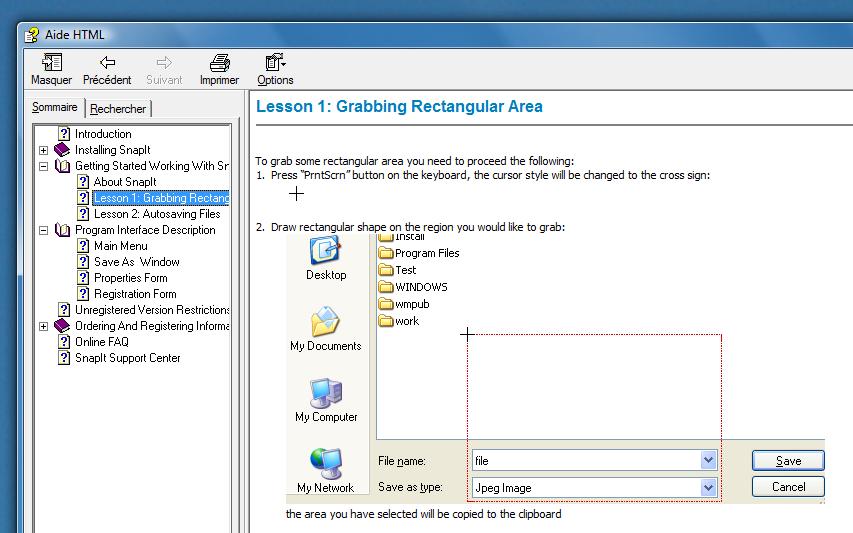 Press F12, and the cursor changes into a crosshair. Click in the screen at the location you want to cut out, move the crosshair to the opposite corner, click again, and, depending on the settings, there will be a JPG , TIF or other picture format on your clipboard. You can either do a Save as of the picture, or use the Autosave option with pre-defined filenames, or copy the picture straight into a word document using Control-v.
The only flaw? What I have explained above would be easier explained if I could “Snap it”! However, I used SnapIt to snap part of a page of the documentation explaining how it works!
After I had kept my part of the bargain, I promptly received my registration code from the software provider, turning my trial copy into an officially registered copy. Julia Taylor, the representative, came up with the following suggestion for those who are interested in the software:
Please mention in your blog about a giveaway for your readers if they also create a review in any blog / forum / twitter / facebook, etc, and contact me with link to the review, I will issue a reg code and name for them.
So if you are interested, you can download a trial copy (click here for the link), then write a review and send details to Ms Taylor at julia.taylor@digeus.com, and Julia is your Aunt!
For our own website click here.

No comments:
Post a Comment